Table of Contents
Power of the Mud
Paul Granjon & Michka Mélo, May 10th-13th, 2017, Cardiff

0. Abstract
- We built five different home-made microbial fuel cells (MFCs), using graphite rods, powder, or home-made graphite felt, as well as iron oxide as a mediator for some of them. They are currently building up their bacterial activity, and we have no results on their performance yet.
- Regarding the power harnessing system (PHS) After frustrating results with the Beam electronics circuit, Paul managed to design another circuit where the BBC microbit microcontroller (which we will use to control the robot) opens the gate of a 2N3904 transistor to power itself, while running on a short spike of power controlled by the opening of the 1381 voltage detector between 2.4 V and 2.2 V, itself letting the current flow through a 2N3904 (scheme in full text).
- However, this circuit might not be sufficient, as the S882-Z charge pump (used by Mudwatt) will charge the supercap connected to its output at most at 1.8 V, which is not enough neither to power the BBC microbit (shuts down around 1.8 V), nor to activate the 1381 voltage detector (2.4 V activation for rising voltage). On our side, we had tested the circuit with a full-charged 2.7V 1F supercapacitor.
- We are now exploring alternatives including :
- putting MFCs in series to increase the available voltage
- to start-up a different charge pump with a higher input voltage, and a higher output voltage which could be sufficient to run the BBC microbit.
- to charge a supercap to directly feed the BBC microbit controller
- putting a second boost converter or charge pump after the S882-Z to push the voltage a little bit higher.
- Further experimentations with various components will be needed to test these alternatives, while keeping in mind that we want available (not outdated) components, if possible through-hole ones, and the simplest possible circuit.
1. Home-made Microbial Fuel Cells (MFCs)

1.1 Material list
- Graphite powder (Inoxia Ltd, via Ebay)

- Graphite rods (scholar stuff)

- Wool (old blanket)

- FeO2 powder for ceramicists (via Ebay)

- Inox wire (Amazon, for DIY jewel-makers)

- Food tupperwares with clipping lids (Amazon)

1.2 MFC composition
We made five new batteries in 500 ml food quality tupperwares with clipping lids.
1.2.1 Graphite powder MFC (A)
Layer by layer, from bottom to top, we have :
- serpent-shaped (about 10 crossings across the tupperware) inox wire, with a vertical section insulated with the black (-) plastic cover of a reclaimed multi-fiber wire

- 1-cm-thick layer of graphite powder, mixed with water

- (soaked) wool membrane
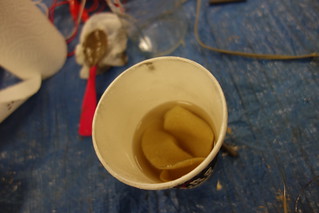
- mud

- (soaked) wool membrane
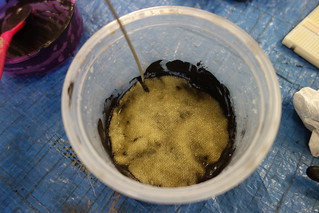
- serpent-shaped (about 10 crossings across the tupperware) inox wire, with a vertical section insulated with the grey (+) plastic cover of a reclaimed multi-fiber wire
- A small bit of red mono-fiber wire is woven around the (+) electrode wire to clearly distinguish it from the (-) electrode wire
- 1-cm-thick layer of graphite powder, mixed with water

- both electrode wires are interwoven on the top to avoid the top (+) electrode to sink away from oxygen

- a small opening is cut on side of the lid with a cutting clamp to let the electrode wires go through towards the circuit
- the lid is drilled with
- 9 small holes for aeration
- one additional smaller hole to place a screw
- the screw is screwed from the inside of the tupperware, with a small “écrou” on the outside to fix it properly
- we then put the Mudwatt circuit board on the screw with no additional “écrou”
- this system allows to open the lid without messing with the mix and the electrodes inside, as we can easily remove the board
- the electrode wires are then connected to the Mudwatt board, like in the kits
- each electrode has a reported resistance of about 300 ohms.
1.2.2 Graphite powder and iron oxide (FeO2) (B)
Layer by layer, from bottom to top, we have :
- serpent-shaped (about 10 crossings across the tupperware) inox wire, with a vertical section insulated with the black (-) plastic cover of a reclaimed multi-fiber wire
- 1-cm-thick layer of graphite powder, mixed with water
- (soaked) wool membrane
- mud containing 2 spoons of FeO oxide thoroughly mixed

- (soaked) wool membrane
- serpent-shaped (about 10 crossings across the tupperware) inox wire, with
- 1-cm-thick layer of graphite powder, mixed with water, with a vertical section insulated with the grey (+) plastic cover of a reclaimed multi-fiber wire

- A small bit of red mono-fiber wire is woven around the (+) electrode wire to clearly distinguish it from the (-) electrode wire
- both electrode wires are interwoven on the top to avoid the top (+) electrode to sink away from oxygen
- small opening is cut on side of the lid with a cutting clamp to let the electrode wires go through towards the circuit
- the lid is drilled with
- 9 small holes for aeration
- one additional smaller hole to place a screw
- the screw is screwed from the inside of the tupperware, with a small “écrou” on the outside to fix it properly
- we then put the Mudwatt circuit board on the screw with no additional “écrou”
- this system allows to open the lid without messing with the mix and the electrodes inside, as we can easily remove the board
- the electrode wires are then connected to the Mudwatt board, like in the kits
- each electrode has a reported resistance of about 300 ohms.
- iron oxide was tried after Paul noticed red spots on the walls of the most blinking Mudwatt. We think it might be a good electron carrier.
1.2.3 Graphite rods (C)
Layer by layer, from bottom to top, we have :
- graphite rods cut to fit in the tupperware, and woven together with inox wire, with a vertical section insulated with the black (-) plastic cover of a reclaimed multi-fiber wire


- mud

- graphite rods cut to fit in the tupperware, and woven together with inox wire, with a vertical section insulated with the grey (+) plastic cover of a reclaimed multi-fiber wire.

- A small bit of red mono-fiber wire is woven around the (+) electrode wire to clearly distinguish it from the (-) electrode wire
- both electrode wires are interwoven on the top to avoid the top (+) electrode to sink away from oxygen
- a small opening is cut on side of the lid with a cutting clamp to let the electrode wires go through towards the circuit
- the lid is drilled with
- 9 small holes for aeration
- one additional smaller hole to place a screw
- the screw is screwed from the inside of the tupperware, with a small “écrou” on the outside to fix it properly
- we then put the Mudwatt circuit board on the screw with no additional “écrou”
- this system allows to open the lid without messing with the mix and the electrodes inside, as we can easily remove the board
- the electrode wires are then connected to the Mudwatt board, like in the kits
- no resistance was measured on electrodes
1.2.4 Graphite rods and iron oxide (FeO2) (D)
Layer by layer, from bottom to top, we have :
- graphite rods cut to fit in the tupperware, and woven together with inox wire, with a vertical section insulated with the black (-) plastic cover of a reclaimed multi-fiber wire
- 2 spoons of FeO oxide thoroughly mixed in the mud
- graphite rods cut to fit in the tupperware, and woven together with inox wire, with a vertical section insulated with the grey (+) plastic cover of a reclaimed multi-fiber wire.

- A small bit of red mono-fiber wire is woven around the (+) electrode wire to clearly distinguish it from the (-) electrode wire
- both electrode wires are interwoven on the top to avoid the top (+) electrode to sink away from oxygen
- a small opening is cut on side of the lid with a cutting clamp to let the electrode wires go through towards the circuit
- the lid is drilled with
- 9 small holes for aeration
- one additional smaller hole to place a screw
- the screw is screwed from the inside of the tupperware, with a small “écrou” on the outside to fix it properly
- we then put the Mudwatt circuit board on the screw with no additional “écrou”
- this system allows to open the lid without messing with the mix and the electrodes inside, as we can easily remove the board
- the electrode wires are then connected to the Mudwatt board, like in the kits
- no resistance was measured on electrodes
- iron oxide was tried after Paul noticed red spots on the walls of the most blinking Mudwatt. We think it might be a good electron carrier.
1.2.5 Home-made graphite felt (E)
- serpent-shaped (about 10 crossings across the tupperware) inox wire, with a vertical section insulated with the black (-) plastic cover of a reclaimed multi-fiber wire
- 1-cm-thick layer of graphite powder, mixed with tiny bits (about 1 mm long) of wool and water


- (soaked) wool membrane
- mud
- (soaked) wool membrane
- serpent-shaped (about 10 crossings across the tupperware) inox wire, with a vertical section insulated with the grey (+) plastic cover of a reclaimed multi-fiber wire
- A small bit of red mono-fiber wire is woven around the (+) electrode wire to clearly distinguish it from the (-) electrode wire
- 1-cm-thick layer of graphite powder, mixed with tiny bits (about 1 mm long) of wool and water
- both electrode wires are interwoven on the top to avoid the top (+) electrode to sink away from oxygen
- a small opening is cut on side of the lid with a cutting clamp to let the electrode wires go through towards the circuit
- the lid is drilled with
- 9 small holes for aeration
- one additional smaller hole to place a screw
- the screw is screwed from the inside of the tupperware, with a small “écrou” on the outside to fix it properly
- we then put the Mudwatt circuit board on the screw with no additional “écrou”
- this system allows to open the lid without messing with the mix and the electrodes inside, as we can easily remove the board
- the electrode wires are then connected to the Mudwatt board, like in the kits.
- each electrode has a reported resistance of about 300 ohms.
2. Power Harnessing System
2.1 Joule Thief
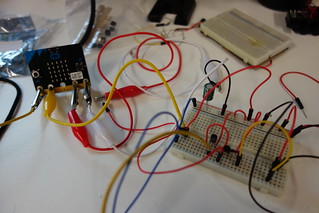
- I did not manage to reproduce the results obtained in Brussels in September
- My original JT only allows the LED to light up when the voltage is higher than the actual voltage at which the LED lights up without the JT.
- The current consumption is very high.
- I tried several of the best transistors advised by Watson, but it did not help.
- Paul suggested that I could simulate the MFC with a resistor-based voltage divider, made of two resistors in series, with our simulated MFC (+) between the two resistors, and the (-) after the two resistors. This way I can control both the voltage (a function of both resistors value) and the current (limited by the total resistor value of both resistors). This might be less problematic.
2.2 1381 Solarbotics from Beam electronics
- We assembled the Beam electronics 1381 solarbot circuit again, but where disappointed by the fact that it would drain very quickly (few seconds) all the energy of our 1 F 2.5 V supercapacitor.
- We tried to change the load (a 270 ohm resistor in series with a blinking LED) with a BBC Microbit circuit, but it did not change anything (the BBC micro would stop its blinking LED after 8 blinks)
- We tried to connect directly both loads to the supercap without the circuit, and their both run for way longer. The problem is therefore in the circuit.
- We also tried to change the supercap to a 1 F 2.7 V and to change the 1381E voltage detector chip to a 1381J, but nothing changed.
- We tried to change the 1381J for another 1381J, but nothing changed.
- We entirely disassembled the circuit and reassembled it, but nothing changed.
2.3 Exploring the Seiko chip possibilities
- The start-up discharge voltage is at 1.8 V.
- The stop discharge voltage is between 0.3 and 0.6 V lower, which is not enough to run efficiently the circuits envisioned for our robotic installation.
- We found in Meehan and Gao the reference of the boost converter to which it is connected, it is still available, but in surface mount.
2.4 “Post-Beam” design
- Paul tried just to test a simple circuit with the 1381 voltage comparator output directly connected to the BBC microbit. The 1381 did not supply enough current to power the BBC microbit.
- Paul then tried to connect the base of a 2N3904 transistor to the 1381, and then power the BBC microbit from the supercap through the collector-emitter junction of the 2N3904. It did work this way, with a better autonomy than with the 1381 solarbot circuit.
- Paul is now trying a new design, where he tries to use the short burst allowed by the 1381E (few fractions of a volt of supercap voltage difference between opening and shutting down) to power the BBC microbit enough so that it can open the gate of another transistor (also 2N3904) to power itself directly from the 2.7V 1F supercap. Instead of the BBC microbit shutting down when the 1381 shuts down (around 0.2 V below its light-up voltage), it will shut down when the voltage provided by the supercap is too low to power the BBC microbit. The BBC microbit will then shutdown, closing the gate of the 2N3904 it controls, and thereby allowing the supercap to charge again.
- IT WORKED !!! (on a fully charged supercapacitory rating at 2.7 V 1 F)
- When connecting a small motor to the BBC microbit on this same circuit, we have about 10 seconds of full motor operation on the 1F 2.7V supercap.
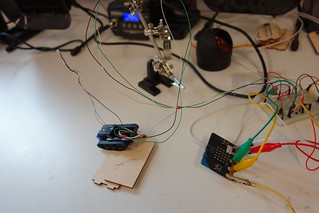
- When connecting the input to the charge pump S882-Z, itself connected to a 0.3 V power supply (equivalent to 1 MFC), Paul observed that it would charge of 0.01 V every minute, which means that it would take 90 minutes to charge the supercap from his 1.8 V minimum (when the BBC microbit shuts down) to its 2.7 V maximum charging voltage. However, with multiple MFC in series, it might take less time.
- !!! Beware ! The MFC current supply might be much lower than the one from the power supply (which however is < 10 mA anyway, according to what the LCD screen says).
2.5 Charging a supercap from Mudwatts

2.5.1 Overnight parallel post-chip supercap charge
Results
- We connected our three (inequally) working Mudwatts in parallel to a 0.22 F 2.5 V supercap.
- We left each Mudwatt (S882-Z) chip on each batteries, and connected the output of each chips in parallel of each other.
- About one hour after the start of the experiment, it was charged at 0.25 V.
- After letting it overnight, it was only charged at 1.9 V, and we could not see any charging activity with a typical multimeter.
- We would have expected a charge reaching 2.5 V, which is the maximum rating of the supercap…
Consequences on the PHS design
- …it is actually a limitation of the S882-Z chip, which will only charge up to 1.8 V (according to the datasheet).
- This means that our supercap will only charge up to 1.8 V, which is not sufficient to power the BBC microbit
- or even open the 1381 voltage detector, which opening rising voltage limit is at 2.4 V.
- This means that we need another boost converter or charge pump using the 1.8 V charged supercap energy to bring it up to 2.4 V to activate the 1381 voltage detector, and then power the BBC microbit enough to open the gate of the 2N3904 feeding itself longer directly from the energy source.
- Some questions include :
- Do we need another supercap at the output of the second boost converter/charge pump to store energy to feed the BBC microbit, or will the connexion of the boost converter/charge pump to the BBC microbit be sufficient in itself ?
- Could the second boost converter/charge pump replace the need for a post-Beam circuit (1381 voltage detector + transistors), by directly powering the BBC microbit in the appropriate conditions ?
- Could we put some MFC in series, and use a different charge pump with a higher supply/input voltage, but a higher output voltage to directly power the BBC microbit from the charge pump ?
- Circuit design constraints :
- Few and available (not outdated) components, big enough to be soldered with Fablab equipment.
- Available (and not outdated) components.
2.5.2 1-hour parallel post-chip supercap charge
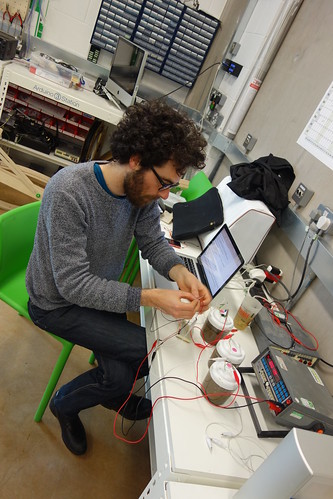
- We connected our three (inequally) working Mudwatts in parallel to a 0.22 F 2.5 V supercap.
- We left each Mudwatt (S882-Z) chip on each batteries, and connected the output of each chips in parallel of each other.
- About 60 minutes after the start of the experiment, it was charged at 397.7 mV.
2.5.3 Voltage measurements on MFC in series
- The three MFC in series, connected directly to the voltmeter whithout any Mudwatt chip, sum up to a voltage of about 1,35 V.
- We still have this kind of “capacitor effect”, which makes the voltage measurement rise over time (it started at 1,35 V, few moments after it was at 1,36 V, then 1,37 V, then 1,38 V and still steadily rising, without giving a feeling that it would stabilize at some point. I stopped it a 1,42 V).
- My feeling is that the “true” measurement is the one at the beginning 1,35 V, which is the one happening when the load is on, the others being an adaptation of the behavior of the MFC when the load is the voltmeter.
- The single MA MFC rates at 414 mV at the beginning of the measurement (and then climbs up).
- The single MB MFC (the one which blinks the most) rates at 613 mV at the beginning of the measurement (and then climbs up).
- The single MC MFC rates at 412 mV at the beginning of the measurement (and then climbs up).
- The single A MFC rates at 122 mV, with 180 microA current.
- The single B MFC rates at 152 microA current
- The single C MFC is complicated to measure, the value is constantly varying :
- either bell shaped value, increasing then decreasing
- or decreasing only
- or increasing only
- about 600 mV (decreases before stabilization)
- on the smaller calibration button (200 microA) > slows very much between 100 and 200 microA.
- We stopped here the measurements of the home-made MFCs. There is clearly some activity (over 100 microA current in the batteries), but the electrolytic effects in the MFCs makes them difficult to measure, and we will not get any precise measurement anyway. Something seems to happen. Just let it build up…
2.5.4 Parallel supercap charge without chip
- The supercap (previously emptied) charges very quickly (few minutes), and reaches a plateau around between 450 and 500 mV, which correspond to the voltage of the three parallel-connected MFCs.
2.5.5 1-hour parallel pre-chip supercap charge
- We connected our three (inequally) working Mudwatts in parallel to a 0.22 F 2.5 V supercap.
- We directly connected the output of each Mudwatts in parallel of each other, and connected a single Mudwatt (882-Z) chip in parallel to all of them.
- Start at 12h07
- About 35 minutes after the start of the experiment, it was charged at 113 mV.
- About 71 minutes after the start of the experiment, it was charged at 216 mV.
2.5.6 1-hour series post-chip supercap charge
- We connected our three (inequally) working Mudwatts in series to a 0.22 F 2.5 V supercap.
- We left each Mudwatt (S882-Z) chip on each batteries, and connected the output of each chips in series.
- Start at 13h26
- About 65 minutes after the start of the experiment, it was charged at 346 mV.
2.5.7 Chipless series supercap charge
- We connected our three (inequally) working Mudwatts in series to a 0.22 F 2.5 V supercap without any Mudwatt chip.
- The open circuit voltage was measured at 1.4 V.
- The supercap charged to 0.7 V in less than a minute.
- After 20 minutes, it had reached 1.21 volts.
2.5.8 1-hour series pre-chip supercap charge
- We connected our three (inequally) working Mudwatts in series to a 0.22 F 2.5 V supercap.
- We directly connected the Mudwatts in series, and connected a single Mudwatt (882-Z) chip to all of them.
- Start at 16h03
- After less than a minute, the supercap had charged to about 120 mV.
- After 8 minutes, it had charged to 500 mV.
- After 20 minutes, it had charged to 523,1 mV.
- Then, the charge started to slightly decrease, ununderstandably.
3. Designing the robotic installation
- We thought of a couple of sloth robots suspended to a cable or rail, which would move by small bursts provided by the MFC until meeting each other at the middle of the rail.
- We thought of making them communicate with a communication tower which would emit light and sound when the sloths send a message saying that they have met.
- The two sloth would be controlled by a single BBC microbit and powered by a single MFC.
- The communication tower would be controlled by its own BBC microbit and powered by an arm-muscle-powered system to have enough to be continuously listening to potential signals coming from the two sloths.
- We would have another light and sound tower running directly from MFC power without a BBC microbit controller.
4. Making the pots
- We can find appropriate clay in Penarth
- Dock beach
- At the foot of the cliff, falls from the clay layer at the top of the cliff.
- Let it dry a bit.
- Cook it at 1100 °C.
- We could glaze some other pots with low-tide clay.
- However, if we want to use the Penarth clay, we need to waterproof it with wax, because glazing at 1600°C will be too much, it will break down.
